by Jenni Fritzlan

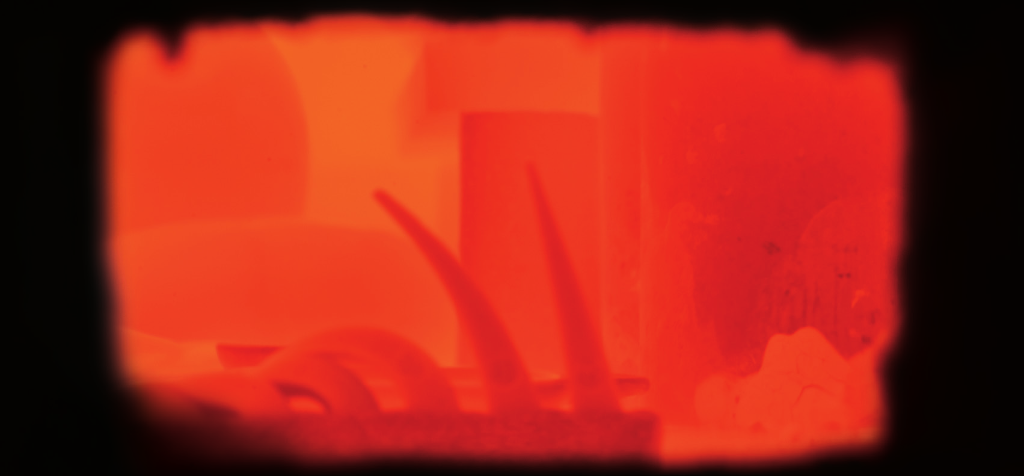
Inside the kiln temperature will reach 2400 ° (F)
Wood or Gas?
“Why build a wood-fired kiln?” some have asked me. “It’s going to be so much more work than your gas-fired kiln.” But we are not necessarily looking for the easiest way to fire, or even for a short-term solution to the many problems we have been having with our gas kiln. Would a gas kiln be easier to fire? Definitely! But in light of current concerns about the long-term availability of inexpensive fossil fuels, and given their nonrenewable nature, wouldn’t a kiln fired with wood be more dependable for us in the long run? We took questions like these into consideration when we began to look into building a new kiln.
Early in 2010, we were having several types of difficulties with our gas-fired kiln. Firing temperatures were very uneven; we were unable to reliably regulate the kiln’s atmosphere during firings; and the electronic safety devices in the kiln were beginning to fail regularly, sometimes even during firing. After much study, we concluded it would be best to build a new kiln. I began researching kiln designs, searching in books and traveling to look at other kilns in use. When we found a gas-fired kiln we liked, that had been in constant use for many years, we took pictures and set out to design plans for it. I drew numerous sketches, worked on quotes and called other potters for advice. In the end, we had to put our plans on hold, when we discovered that the new kiln would cost a staggering $15,000!
We continued to limp along with the kiln we had and began to consider what our next steps should be. As mentioned earlier, the fuel source was a big concern for us. At The Ploughshare, we not only teach sustainable living skills, but we also strive to live them out ourselves. In my studies, I became increasingly aware of the unreliability of propane kilns, and besides, propane is not a sustainable option. So I asked myself, “Why are we trying to build a gas kiln? Why not wood?” Wood is not only a renewable energy source; it has been the fuel of choice for kilns since antiquity. In fact, much hard work over the centuries has gone into developing glazes and surface effects that utilize fly ash from wood firing. I became very excited about all this. I knew there would be many details to work out, but we all felt that this type of kiln would be better suited to our goal of sustainable living. Not only that, but we also discovered that the cost of building the kiln fired by wood would be less than half of what the gas kiln would have cost! Once we made the decision to build the wood-fired kiln, things quickly fell into place, and in four months we had enough money to get started. We ordered the materials in late January of 2012, and on March 24, we laid the foundation.
Types of Kilns
Before I tell you about the design and building of our wood kiln, there are a few different types of kilns I’d like to discuss. The earliest kilns were simply pits in the ground into which potters placed their pots. Early potters would cover the pots with combustible materials such as straw, dried manure and brush or sawdust, then light the whole pile and leave it to burn. Frederick Olsen describes the development of more advanced kilns in The Kiln Book. Olsen, referring to a Japanese master potter, writes:
The late Tomimoto Kenkichi related his theory on the development of the anagama [A Japanese word meaning “hole kiln”]. Through the centuries, potters realized that the more enclosed the primitive pit kiln became, the hotter the firing and the more durable the pottery. Firing temperatures were increased by banking up the sides with clay . . . . Pottery villages were always built upon the clay source. (China, Korea and Japan have vast amounts of stoneware clays ready to use right out of the ground, while in comparison, the Middle East has very little usable clay.) Utilizing the banks and hills of clay, they hollowed out holes large enough for a man to crawl into. The main cavity was widened and then tapered back into a chimney flue leading up to the surface. After the hole and cavity were hollowed out, the fire box, floor and walls were shaped in the clay and allowed to dry. A small fire of increasing intensity was built in the entrance or firebox and allowed to burn for weeks until the inside walls were bisqued [which changed the clay into ceramic]. This transformed the chamber into a monolithic structure. 1
Anagamas are still used today in some Oriental countries, along with other types of kilns. A related form of kiln, the noborigama (a multiple-chambered kiln), is still commonly used in Japan and elsewhere. Both of these styles, and any type of kiln that has a chimney on one side and the fire chamber on the other, are called cross-draft kilns. Cross-draft kilns allow the development of special wood ash effects because the flames from the fire chamber, along with a lot of wood ash, are pulled through the pots in order to exit the chimney. This leaves ash on the pots, and when the build-up gets thick enough, the ash melts and turns to glaze.
Another style of kiln is the downdraft kiln, which originated in Germany in the 1800’s and is one of the most commonly used kilns today. It is designed to use either wood or gas as the fuel source, and the heat source is located below or level with the base of the firing chamber. Flames come into the firing chamber and rise to the top of the kiln. The heat then rolls around the top and is sucked back down through the pots and out the flue (the channel through which the smoke and fumes exit the kiln). This is the type of kiln we built. With the heat source under the firing chamber, most of the ash will stay in the fire boxes. This is desirable for us at this point, because we want to be able to continue making our existing line of glazes, and wood ash has a very strong effect on glazes. In my research, I came across a book called Kiln Construction: A Brick by Brick Approach, which has detailed plans for a nice down-draft wood kiln. The book’s author, Joe Finch, has built kilns of this type all over the world, and many people have been happily using them with great success from the very first firing. Our kiln is based on his design, with one modification—rather than wrap the kiln with insulation, we used the more traditional approach of using two layers of bricks to build the kiln’s walls. 2
Once we have gained more experience with this kiln, we plan to disassemble our gas kiln and use its bricks to build a second kiln that will be cross-draft. This will enable us to develop a line of wares with special wood ash effects.
Building the Kiln
We laid the foundation for our kiln on March 24, and with the help of a few men in our community, we built the fireboxes. These were constructed using dense, high-temperature bricks held together with a special mortar called sariset. In the U.S., we call these high-duty bricks; in Great Britain they are sometimes called heavies, as they weigh about five pounds apiece. Once the fireboxes were complete, a few of us from the shop, with the assistance of several students, built the walls of the firing chamber to their full height of approximately eight feet in only two days. The walls are built with a simple interlocking construction, and hold themselves up without the use of mortar. Dry-stacking these light-weight, insulating bricks allows for some flexibility in the walls during firing, since the bricks will expand and contract in the intense heat. Mortar would tend to crack with the expansion and contraction and deteriorate the walls much more quickly.
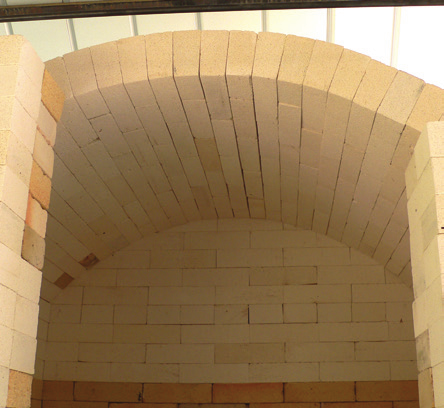
Before the arched roof could be built, we put a metal frame in place on the kiln to buttress the walls, so the weight of the arch would not push them over. The frame was built at our community’s blacksmith shop, then assembled and tied together at the kiln. It is connected with tie rods and nuts, so that, if necessary, we can tighten it more later. Next, we made an arch former of plywood and hardiboard, in the shape of the arched roof, and propped it up inside the kiln, level with the top of the walls. We laid the roof on top of it, using bricks that are shaped especially for forming arches. The inside edge of these bricks is narrower than the outside edge, so that when they are placed side by side, they wedge together in an arch and will not come down. Once we had all the roof bricks laid, we removed the arch former to leave the free-standing arch in place.
The next step in the process was to build the chimney. We first built the flue, using high-duty bricks for the main part, and soft bricks to fit the angles up against the kiln and the chimney, since they are much easier to cut. We capped off the top of the flue with some pieces of kiln shelf, which is made of refractory material. We hope to be able to make a pizza or two on that surface when firing, as it will get very hot! The chimney is built of high-duty fire bricks up to the height of the kiln chamber, and we used a steel pipe to bring it up to nineteen feet tall. Eventually, we will build it up the rest of the way with common house bricks. The kiln is fired without the use of electricity, so the temperature increase in the kiln depends on the chimney height. This type of kiln is known as a natural draft kiln. Once a fire is going, the draft going up the chimney maintains the airflow into the kiln and keeps the temperature climbing. A damper in the flue allows us to control the draft, and I believe one of the more challenging aspects of operating the kiln will be learning how to feed the fire and manage the damper to keep the temperature climbing at the desired rate.
The First Firing of the Kiln
We completed the construction of our new wood-fired kiln on June 16, 2012, and fired it the same day. The first firing was a great success! We started the fires at about 5:20 a.m. and fed scraps of pine, mesquite and oak into the kiln for the next 12 hours, about once every 5 minutes. The temperature climbed steadily until it reached about 2100°F, then it began to stall. Toward the end of the firing, it is not uncommon to have difficulty getting the temperature all the way up to the required 2400°F. One of the men from the woodworking shop next door came by and gave us a few suggestions on how to stoke the fire. This helped a lot!

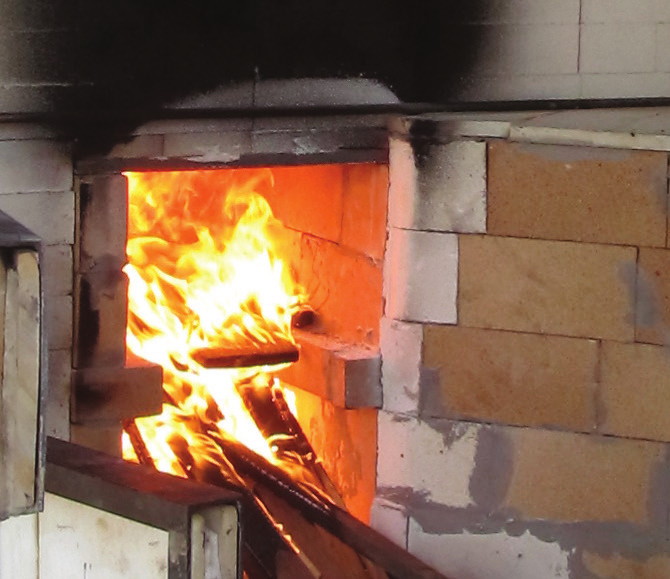
The firebox of the wood-fired kiln
The fireboxes have three layers: the first floor where the ashes collect; the second floor, made of perforated kiln shelves, where the coals collect; and the fire bars, where the wood is fed into the fire. The coals on the second floor were creating too tight of a mound, thus choking the airflow to the fire. Once we spread the coals around in the firebox and started feeding the fire more frequently with smaller pieces of wood, the temperature resumed its climb and reached 2400°F in roughly 45 minutes. Then we stopped feeding the fire and closed the firebox doors and the damper. It was now 5 p.m.

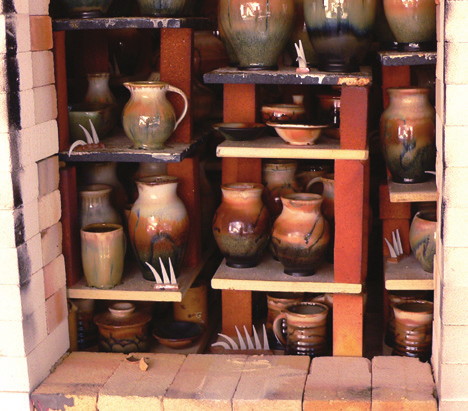
Finished pottery
Monday morning, the temperature was down to 145°F, so we unbricked the door (removed the bricks that form the kiln door) and began taking pots out. They were beautiful! The colors were more vibrant than they had been in the gas-fired kiln, due to the influence of the ash on the glazes. We had fired a load of pots with our popular Desert Tones glaze. One good example of how the wood ash affected the glaze in a positive way is what happened with the base glaze of the Desert Tones. Wood ash acts as a flux to glazes, lowering the melting point. In the gas kiln, the glaze turns into a dry matte, sometimes so rough that the pots appear to be unglazed. In the wood kiln, the ash fluxed the glaze (or brought it into a greater melt) just enough to give the pots a satin surface instead of matte, without altering the color. The other glazes also have more brilliance.
Overall, we are very pleased with the results of the new kiln and look forward to gaining more experience with it in the weeks ahead.
